Home » Posts tagged 'Premiere Pro'
Tag Archives: Premiere Pro
Adding Closed Captions to Adobe Premiere Pro Videos
When I started making videos for students, I wanted to make the videos as accessible as possible. One way to do this would be to add Closed Captions to my videos. Adobe Premiere Pro allows users to create their own captions for their videos, but you have to put them in manually. This can be a little tedious, I won’t lie, but I think it is 100% worth the effort to make the videos accessible to all.
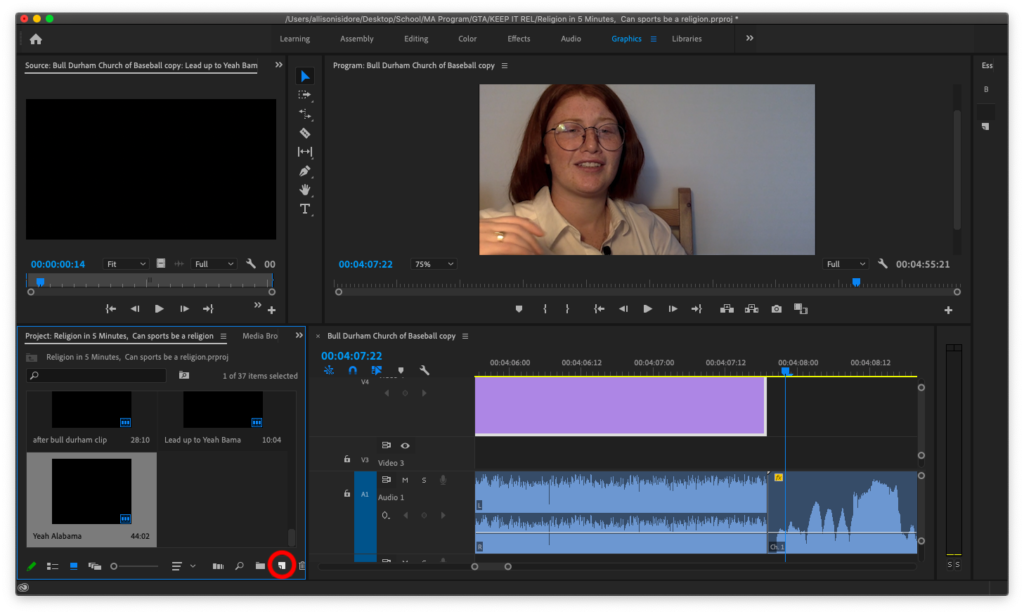
I recommend uploading all the video and audio clips to Premiere and placing them in the order, you want your video to play. Next, go to the left-hand corner where all the media is stored. There is a small icon with a folded corner called “New Item.”
Once you click on it, a menu should appear with a list of things you can now add to your video. But for our purposes today, you will want to click on the Captions.

A new menu will appear, with several caption options to choose from, including open and closed captions. Closed captions simply put allows the viewer to choose whether they want to have captions on the screen. While open captions are always on the screen, for a video, if you want to have closed captions on in Premiere, you should choose between CEA-608 and CEA-708. But if you want to have open captions in your video, then pick Open Subtitling.


After you pick, a new caption box will appear in the project file in the lower left-hand corner. Next, drag the caption file over your video file in the editing panel on your right and a purple bar will appear. What I do now, is drag the purple box the length of the video file this way I can have different sections of captions per video clip.
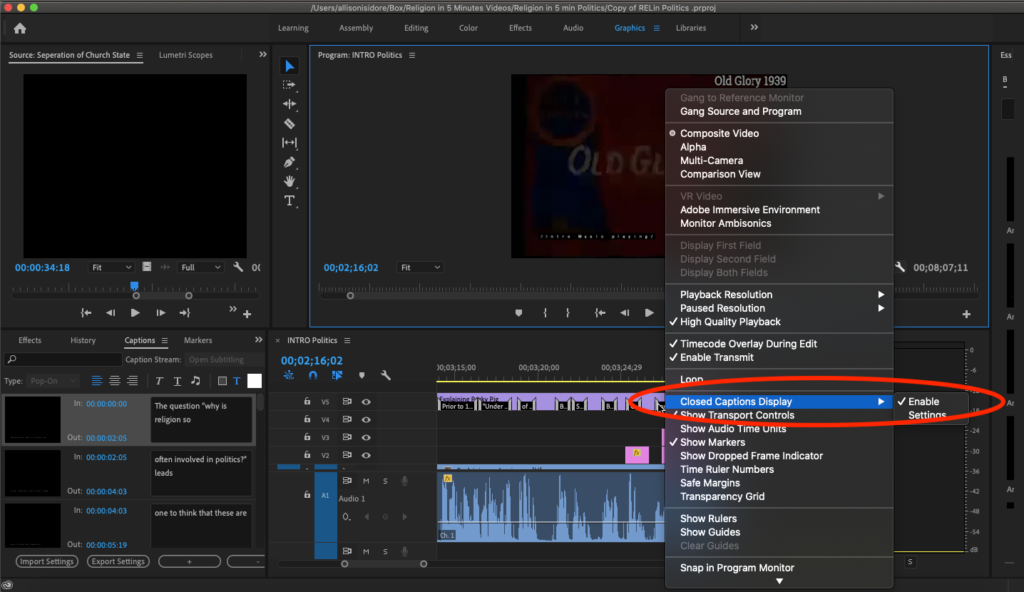
In order to see the captions while you write them onto the video, you must enable them. To do this, click on the little hand wrench icon under the video, which says, “Settings.” Once the menu opens, scroll down to the Closed Caption display and click on Enable. You should see your captions on the video display while you are writing them out. This is very important.
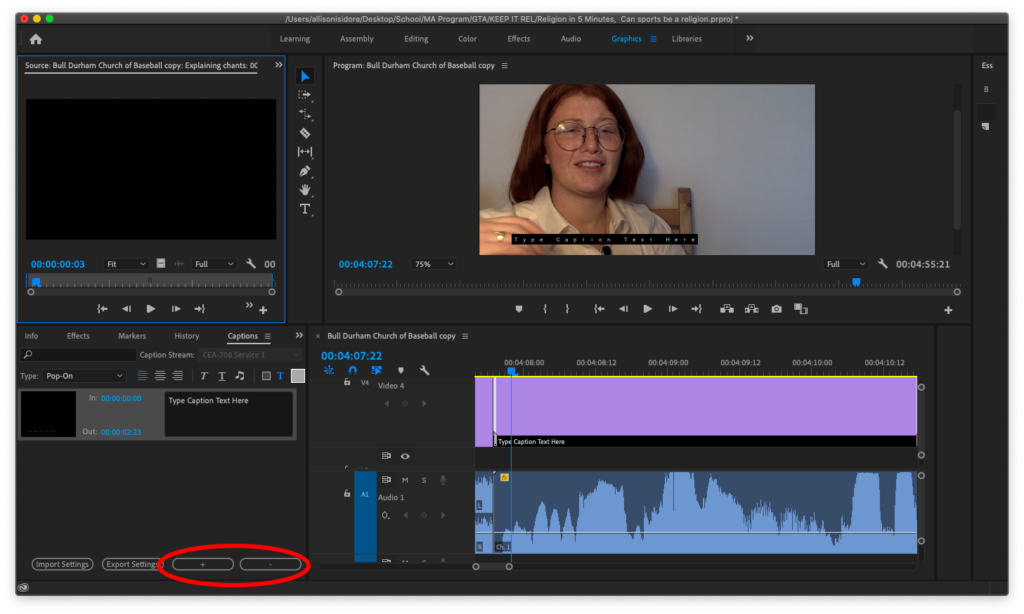
Now comes the tedious part. There is only so much space to write the caption, and depending on the word length, you might only be able to fit four or five words in the box. To add more caption boxes, go to the bottom of the caption editing screen, click on the plus or minus signs. Once done, you’re ready to export your video; you will have a few export choices for captions. The first is to create a sidecar file that will allow your viewer to decide whether or not they want captions on the video. The second is to burn your captions into the video; in this case, the captions will automatically become a part of the video, and the viewer cannot turn them off. I choose this option because it makes it easier for those who might not know how to turn captions on will have them on the video already.